How To Transplant Your Cannabis For Bigger Weed Plants
Published :
Jun 20, 2017
Categories :
Other subjects

Transplanting is a key component in the growth cycle of a cannabis plant. Doing so will enable your plants' roots more space to spread and grow, allowing them to uptake more nutrients and water, resulting in healthy plants and an optimal yield.
Transplanting your weed plants into bigger pots and containers at just the right stages of its growth cycle is an important manoeuvre when it comes to optimal health and yield. Leaving your plant in the same pot for too long, even when it has outgrown it, will cut its potential short and make it root bound and its growth will cease. Transplanting it is important, but it is paramount that it is done correctly in order to avoid stressing your cannabis plants to a degree that their growth may be affected.
WHEN TO TRANSPLANT
Along the growth cycle of your weed plants, there may be several times where you make the choice to transplant them into increasingly larger containers in order for them to growth most efficiently. But where to start? Well, after you have sown your crop into soil, they will shortly enter the seedling stage after both germination and sprouting.
kbniplsel.JPG)
FIRST TRANSPLANTS
After the sprouting stage, your cannabis plants will start to display their cotyledon: the first two leaves that emerge from the plant. These leaves look very similar to newly sprouted watercress. A short period after the cotyledon become visible and make their mark, they will part ways and make way for the first true leaves to emerge. These leaves bare the characteristic marijuana look, sporting a ridged edge and a pointed tip.
Transplanting at this stage is a tad too early, so just make sure your crop babies have adequate water and a decent amount of light to keep them photosynthesising.
Within a period up to 6 weeks, your plants should start to experience rapid leaf growth and their root systems will be fairly well formed. Whatever you've sown your weed seeds in, whether a piece of rock wool or rooting box, by this time it should be apparent that the root systems of your plants are quickly becoming too prolific to remain in a small space.
From this point, fill up a bigger pot with your selected growing medium, such as high-quality soil, dig a hole big enough in the middle to fit your plants' root system in and introduce it into its new temporary home. Add a splash of water to make your plants feel at home.
POSSIBLE SECOND TRANSPLANTS
Within about 3 weeks after this move, the increase in space, nutrition and watering space will have allowed sufficient further growth. If you are growing indoors, you may wish to keep your plant into its second container in order to stop it from growing too big and too obvious. Sativas especially tend to grow to large sizes that might not be manageable in an indoor grow space. You may wish to transplant once again into a larger pot outside.
HOW TO TRANSPLANT
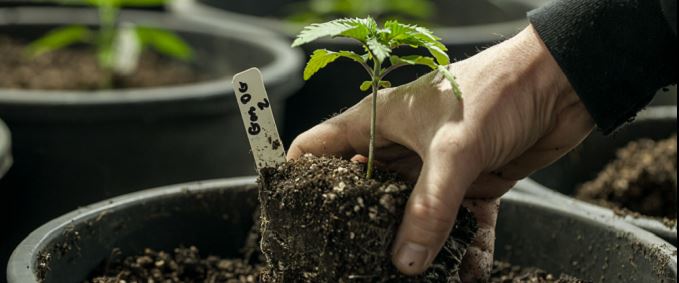
Regardless of how you have sprouted your cannabis plants, when they finally outgrow their starter container, they will need to be moved into a bigger pot in order to grow larger root systems in order to absorb increasing amounts of water and nutrients which will eventually contribute to a large and good quality yield. But how can one do this correctly in order to avoid possible stressors and damage?
Before transplanting, let your plants drain and dry out for a few hours. This will make the soil less likely to collapse, and therefore potentially damage the root system when removing it from its original home.
If your plant is in a pot before a transplant, apply gentle pressure to the outside of the pot, grip the stalk with your fingers, turn the pot upside down and let the root system and intertwined in soil slide out, ready to be placed in the next pot size. Water the new pot with roughly the same amount of water as the plant was used to getting beforehand, in order to prevent water logging. Continue this for a couple of days.