How To Dry And Cure Your Cannabis
Published :
Oct 4, 2016
Categories :
Cannabis cultivation

This process begins the moment you harvest your plants, and ends when all the moisture is removed. Completely dried buds won't cure any further, and it's impossible to restart the curing process by rehydrating the buds afterwards.
There are a lot of variables here, and this critical stage is very important for the taste and potency of your final product. You've put a lot of work into growing your crop, and rushing through this part can cause the terpenoids and cannabinoids contained within your plants to undergo chemical changes that can make them taste like hay or pine needles, and nobody wants that. Instead of rushing through the curing process and smoking your weed as fast as possible, be a little patient, and you'll end up with some quality product in the long run that you can be proud of.
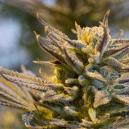
TRIMMING
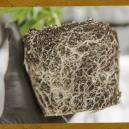
 Prior to drying, give your buds a manicure. Trim away any unnecessary leaf materials, and clip the stems so that each branch has an inch or so of stalk protruding. This is so you can clip it to your line with a clothes peg or tie it with string. Leaves contain chlorophyll, which affects the flavour of your product. It's very important to remove as many of the large leaves as possible. It's easiest to trim your buds while the plant is wet, as the fan foliage will still be rigid and easily identifiable from the flowering buds.
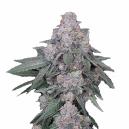
Do your harvesting in a well-lit room with a table and chair. Remember to sit up straight, use good, sharp scissors, and take regular breaks. It's a long, tedious job and a full crop can take several day's work to trim! If you're growing a frosty, trichome-rich plant, like our Super Silver Haze Autoflowering, You can use the trimmed-off sugary leaves to make hashish or edibles.
DRYING OUT YOUR BUDS
 The next stage is to dry your buds out. The aim of drying is to encourage the moisture locked inside the stem and centre of the flower to pull the remaining sugars and resin out of the plant. These ooze out over the bud and crystallise as they dry. Temperature and humidity are crucial at this stage - too hot, and too much of the sugar will evaporate from your buds. Too humid, and mould can develop. If your drying area is too cold, the arterial vessels in the stems of your plant will constrict, restricting the flow of resin to the outside of the buds.
There are a lot of complicated methods you can use to dry out your buds quickly, some involving various pieces of expensive equipment, but honestly, the method that most old-school growers will use is to simply hang up the buds in a dark environment, and let them dry out slowly. Drying methods that use heat can potentially burn away any active cannabinoids, and having your plants in direct contact with a screen or drying medium can also affect the flavour. Fresh air is the purest, most natural way to remove water from plant material, and that's why we hang-dry our buds.
Quick drying your buds is one of the most common pitfalls for impatient first-time growers. The goal is to dry evenly and slowly. The main benefit of slow drying is that it allows for a controlled breakdown of chlorophyll. Chlorophyll-rich weed has an earthy smell which affects the flavour and can be harsh to smoke.
Once your buds are harvested and manicured, hang them up in a dry place, in total darkness. It's important to have just a little bit of airflow, to prevent mould from growing. But it's recommended that you keep airflow to a minimum. Air blowing directly on the plants will affect the rate that the moisture evaporates, affecting THC levels and making the smoke harsh.
We always dry in absolute darkness because photosynthesis still occurs if you expose harvested plants to light. Respiration uses up all the moisture in the bud and prevents energy from transferring to the flower. This will also affect the cannabinoids on the plant, aging them and affecting the high.
After hanging your buds out upside down for a week or so, take a small bud and squeeze it between your fingers. It should be completely dry, but not so brittle that it crumbles or is crushed when you squeeze it. The bigger stems should still be bendy and the smaller stems should snap easily with your fingers. If you pull a nug from a stem, it should snap away from the stalk without leaving a little string behind. "Stringiness" indicates the presence of water in the plant material and means your buds still have a way to go before jarring.
JARRING
 The next step is to store the buds in jars. Place them in wide-mouthed glass mason jars, or smaller jars if you can't get hold of one of these. Bigger jars have more space for moisture and tend to encourage mould. Make sure your jars create a decent seal - we have learned from experience that rubber sealed jars don't work as well. The absolute best are quart-size wide-mouth glass mason jars.
Fill each jar about ¾ with marijuana, so there's still a bit of air. When you shake the jar the buds should move around a bit. Make sure your buds are totally dry so they don't stick together and you don't get any mould. If you find any buds that are still wet, hang them up again and dry them for a little longer.
Open the jars once a day to give them fresh air and to check the moisture level. Be patient - the longer you spend doing this, the tastier and more potent your marijuana will be. It should smell a little more like marijuana every day. If at any point you smell ammonia, it means they are too wet and you need to leave the lid off the jars to let them dry out some more before shutting the lid again. Checking the moisture gives you a daily opportunity to shake the jars, feel them for moist spots, and make sure the buds aren't all sticking together.
If you want to be really precise, a useful tool at this stage is a hygrometer - it allows you to get a reading of the RH (relative humidity) in each jar. Ideally, you want to keep humidity at about 60-65% - in our experience, this will give you the most professional results.
Sometimes, buds that felt dry when placing them in the jars will be moist when you check them a few hours later. The bud needs to "sweat" into it's new environment - the moisture locked into the middle of the bud has seeped into the rest of the flower. Leave the lid off to dry it out further before replacing.
AFTER ALL THAT HARD WORK ...
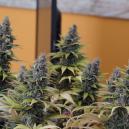
 After a week or two, your marijuana should be perfectly cured and ready for smoking. You can tell when it's ready by pulling apart a bud and bending the stalk in the centre with your fingers. If it snaps easily, it's completely dry. Be sure to store your marijuana in an airtight opaque container. Properly cured and stored buds of a quality strain, like our Amnesia Haze XL Autoflowering, can retain their flavour and potency for years.
And that's it! We hope you are pleased with the results, and wish you the best of luck with your future grows. We just used this technique to cure some Choco Candy, and it tastes gooooooood :)